Cobbler是一个Linux服务器安装的服务,可以通过网络启动(PXE)的方式来快速安装、重装物理服务器和虚拟机,同时还可以管理DHCP,DNS等。
Cobbler可以使用命令行方式管理,也提供了基于Web的界面管理工具(cobbler-web),还提供了API接口,可以方便二次开发使用。
Cobbler是较早前的kickstart的升级版,优点是比较容易配置,还自带web界面比较易于管理。
Cobbler内置了一个轻量级配置管理系统,但它也支持和其它配置管理系统集成,如Puppet,暂时不支持SaltStack。
puppet是一种Linux、Unix、windows平台的集中配置管理系统,使用自有的puppet描述语言,可管理配置文件、用户、cron任务、软件包、系统服务等。puppet把这些系统实体称之为资源,puppet的设计目标是简化对这些资源的管理以及妥善处理资源间的依赖关系。
puppet采用C/S星状的结构,所有的客户端和一个或几个服务器交互。每个客户端周期的(默认半个小时)向服务器发送请求,获得其最新的配置信息,保证和该配置信息同步。每个puppet客户端每半小时(可以设置)连接一次服务器端, 下载最新的配置文件,并且严格按照配置文件来配置客户端. 配置完成以后,puppet客户端可以反馈给服务器端一个消息. 如果出错,也会给服务器端反馈一个消息
cobbler官网:https://cobbler.github.io/
cobbler集成的服务:
PXE服务支持
DHCP服务管理
DNS服务管理(可选bind,dnsmasq)
电源管理
Kickstart服务支持
YUM仓库管理
TFTP(PXE启动时需要)
Apache(提供kickstart的安装源,并提供定制化的kickstart配置)
cobbler配置文件详解:
cobbler配置文件目录在/etc/cobbler
配置文件 作用
/etc/cobbler/settings.yaml cobbler 主配置文件
/etc/cobbler/iso/ iso模板配置文件
/etc/cobbler/pxe pxe模板配置文件
/etc/cobbler/power 电源配置文件
/etc/cobbler/user.conf web服务授权配置文件
/etc/cobbler/users.digest web访问的用户名密码配置文件
/etc/cobbler/dhcp.template dhcp服务器的的配置模板
/etc/cobbler/dnsmasq.template dns服务器的配置模板
/etc/cobbler/tftpd.template tftp服务的配置模板
/etc/cobbler/modules.conf 模块的配置文件
cobbler数据目录:
目录 作用
/var/lib/cobbler/config/ 用于存放distros,system,profiles等信息配置文件
/var/lib/cobbler/triggers/ 用于存放用户定义的cobbler命令
/var/lib/cobbler/kickstart/ 默认存放kickstart文件
/var/lib/cobbler/loaders/ 存放各种引导程序以及镜像目录
/var/www/cobbler/ks_mirror/ 导入的发行版系统的所有数据
/var/www/cobbler/images/ 导入发行版的kernel和initrd镜像用于远程网络启动
/var/www/cobbler/repo_mirror/ yum仓库存储目录
cobbler日志文件:
日志文件路径 说明
/var/log/cobbler/installing 客户端安装日志
/var/log/cobbler/cobbler.log cobbler日志
cobbler命令详解:
cobbler check //核对当前设置是否有问题
cobbler list //列出所有的cobbler元素
cobbler report //列出元素的详细信息
cobbler sync //同步配置到数据目录,更改配置最好都要执行下
cobbler reposync //同步yum仓库
cobbler distro //查看导入的发行版系统信息
cobbler system //查看添加的系统信息
cobbler profile //查看配置信息
cobbler服务端部署
//安装cobbler以及相关的软件
[root@localhost ~]# dnf module list | grep cobbler
cobbler              3 [e]           default [d]                              Versatile Linux deployment server
cobbler              3.3             default [d]                              Versatile Linux deployment server

[root@localhost ~]# dnf module install cobbler:3  -y
[root@localhost ~]# yum -y install httpd dhcp* tftp tftp-server cobbler cobbler-web pykickstart rsync rsync-daemon

//启动服务并设置开机自启
[root@localhost ~]# systemctl restart httpd;systemctl enable httpd
[root@localhost ~]# systemctl restart rsyncd;systemctl enable rsyncd
[root@localhost ~]# systemctl restart tftp; systemctl enabled tftp
[root@localhost ~]# systemctl restart cobblerd;systemctl enable cobblerd

//关闭防火墙和selinux
[root@localhost ~]# systemctl stop firewalld
[root@localhost ~]# systemctl disable firewalld
[root@localhost ~]# cat /etc/sysconfig/selinux
SELINUX=disabled
重启系统

//修改server的ip地址为本机ip
[root@localhost ~]# vim /etc/cobbler/settings.yaml
.........
server: 192.168.91.139		//server的ip地址,为本机ip
.........

//设置next_server的ip地址为本机ip
[root@localhost ~]# vim  /etc/cobbler/settings.yaml
........
next_server: 192.168.91.139	//tftp的ip地址,为本机ip
.........
//生成加密的密码
[root@localhost ~]# openssl passwd -1 -salt "$RANDOM" 'redhat'
$1$13239$gDp1Ocknbtdyxi.TKhrJl0            //这是密码加密后的形式

/将新生成的加密密码加入到配置文件
[root@localhost ~]# vim /etc/cobbler/settings.yaml
....    //此处为省略内容
default_password_crypted: "$1$13239$gDp1Ocknbtdyxi.TKhrJl0"
.....   //此处为省略内容

//将cobbler的dhcp功能打开
[root@localhost ~]# vim /etc/cobbler/settings.yaml
.......
manage_dhcp: true		//打开dhcp功能
.......
[root@localhost ~]# grep 'manage_dhcp:' /etc/cobbler/settings.yaml
manage_dhcp: true

/重启cobbler
[root@localhost ~]# systemctl restart cobblerd


//通过cobbler check 核对当前设置是否有问题
[root@localhost ~]# cobbler check
The following are potential configuration items that you may want to fix:

1: some network boot-loaders are missing from /var/lib/cobbler/loaders. If you only want to handle x86/x86_64 netbooting, you may ensure that you have installed a *recent* version of the syslinux package installed and can ignore this message entirely. Files in this directory, should you want to support all architectures, should include pxelinux.0, menu.c32, and yaboot.
2: reposync is not installed, install yum-utils or dnf-plugins-core
3: yumdownloader is not installed, install yum-utils or dnf-plugins-core
4: debmirror package is not installed, it will be required to manage debian deployments and repositories
5: fencing tools were not found, and are required to use the (optional) power management features. install cman or fence-agents to use them

Restart cobblerd and then run 'cobbler sync' to apply changes.

问题1解决办法:
[root@localhost ~]# yum -y install syslinux*
[root@localhost ~]# cp /usr/share/syslinux/pxelinux.0 /var/lib/cobbler/loaders/
[root@localhost ~]# cp /usr/share/syslinux/menu.c32 /var/lib/cobbler/loaders/
[root@localhost ~]# ls /var/lib/cobbler/loaders/
menu.c32  pxelinux.0

问题2和问题3解决办法
[root@localhost ~]# yum -y install yum-utils

问题4和问题5可以忽略,
因为是debian系统才需要解决,显示使用的是centos8
Debian系统解决办法安装fence-agents
//配置DHCP模板文件
[root@localhost ~]# vim /etc/cobbler/dhcp.template
........
subnet 192.168.91.0 netmask 255.255.255.0 {    //你是那个网段的
     option routers             192.168.91.2;  //网关
     option domain-name-servers 8.8.8.8;       //DNS服务器
     option subnet-mask         255.255.255.0; //子网掩码
     range dynamic-bootp        192.168.91.100 192.168.91.110; //ip地址池
     default-lease-time         21600;
     max-lease-time             43200;
     next-server                $next_server;

//同步cobbler配置
[root@localhost ~]# systemctl restart httpd cobblerd.service
[root@localhost ~]# cobbler sync
.........
running shell triggers from /var/lib/cobbler/triggers/sync/post/*
shell triggers finished successfully
running python triggers from /var/lib/cobbler/triggers/change/*
running python trigger cobbler.modules.scm_track
running python trigger cobbler.modules.managers.genders
running shell triggers from /var/lib/cobbler/triggers/change/*
shell triggers finished successfully
*** TASK COMPLETE ***

管理distro
//挂载镜像
[root@localhost ~]# mount /dev/cdrom  /mnt/
mount: /mnt: WARNING: device write-protected, mounted read-only.

//导入镜像,名字可以随便
[root@localhost ~]# cobbler import --path=/mnt/ --name=CentOS-8 arch=x86_64
task started: 2022-09-23_211409_import
task started (id=Media import, time=Fri Sep 23 21:14:09 2022)
running python triggers from /var/lib/cobbler/triggers/task/import/pre/*
running shell triggers from /var/lib/cobbler/triggers/task/import/pre/*
shell triggers finished successfully
........
starting descent into /var/www/cobbler/distro_mirror/CentOS-8 for CentOS-8-x86_64
processing repo at : /var/www/cobbler/distro_mirror/CentOS-8/AppStream
need to process repo/comps: /var/www/cobbler/distro_mirror/CentOS-8/AppStream
looking for /var/www/cobbler/distro_mirror/CentOS-8/AppStream/repodata/*comps*.xml
Keeping repodata as-is :/var/www/cobbler/distro_mirror/CentOS-8/AppStream/repodata
processing repo at : /var/www/cobbler/distro_mirror/CentOS-8/BaseOS
need to process repo/comps: /var/www/cobbler/distro_mirror/CentOS-8/BaseOS
looking for /var/www/cobbler/distro_mirror/CentOS-8/BaseOS/repodata/*comps*.xml
Keeping repodata as-is :/var/www/cobbler/distro_mirror/CentOS-8/BaseOS/repodata
*** TASK COMPLETE ***

//安装源的唯一标示就是根据name参数来定义,本例导入成功后,安装源的唯一标示就是:CentOS-8-x86_64,如果重复,系统会提示导入失败


//查看cobbler镜像列表
[root@localhost ~]# cobbler list


//查看详细信息  查看指定的--name 接镜像名
[root@localhost ~]# cobbler distro report --name CentOS-8-x86_64
Name                           : CentOS-8-x86_64
Architecture                   : x86_64
Automatic Installation Template Metadata : {'tree': 'http://@@http_server@@/cblr/links/CentOS-8-x86_64'}
TFTP Boot Files                : {}
Boot loader                    : grub
Breed                          : redhat
Comment                        :
Fetchable Files                : {}
Initrd                         : /var/www/cobbler/distro_mirror/CentOS-8/images/pxeboot/initrd.img
Kernel                         : /var/www/cobbler/distro_mirror/CentOS-8/images/pxeboot/vmlinuz
Kernel Options                 : {}
Kernel Options (Post Install)  : {}
Management Classes             : []
OS Version                     : rhel8
Owners                         : ['admin']
Redhat Management Key          :
Remote Boot Initrd             : ~
Remote Boot Kernel             : ~
Template Files                 : {}

[root@localhost ~]# cobbler profile get-autoinstall --name CentOS-8-x86_64 > /var/lib/cobbler/templates/centos8.ks
.......
# Firewall configuration
firewall --disable              //关闭防火墙
........
%packages
@^minimal-environment                //设置最小安装
%end


//此时使用虚拟机去安装系统并不会成功  需要做如下操作
[root@localhost ~]# cd /usr/share/cobbler/bin/
[root@localhost bin]# ls
migrate-data-v2-to-v3.py  migrate-settings.sh  mkgrub.sh  settings-migration-v1-to-v2.sh
[root@localhost bin]# bash mkgrub.sh
[root@localhost bin]# cd /var/lib/cobbler/loaders/
[root@localhost loaders]# ll
total 72
drwxr-xr-x 2 root root    79 Sep 23 21:23 grub
lrwxrwxrwx 1 root root    31 Sep 23 21:23 ldlinux.c32 -> /usr/share/syslinux/ldlinux.c32
-rw-r--r-- 1 root root 26272 Sep 23 21:01 menu.c32
-rw-r--r-- 1 root root 42376 Sep 23 21:01 pxelinux.0
[root@localhost loaders]# cobbler sync
[root@localhost loaders]# systemctl restart httpd cobblerd rsyncd dhcpd
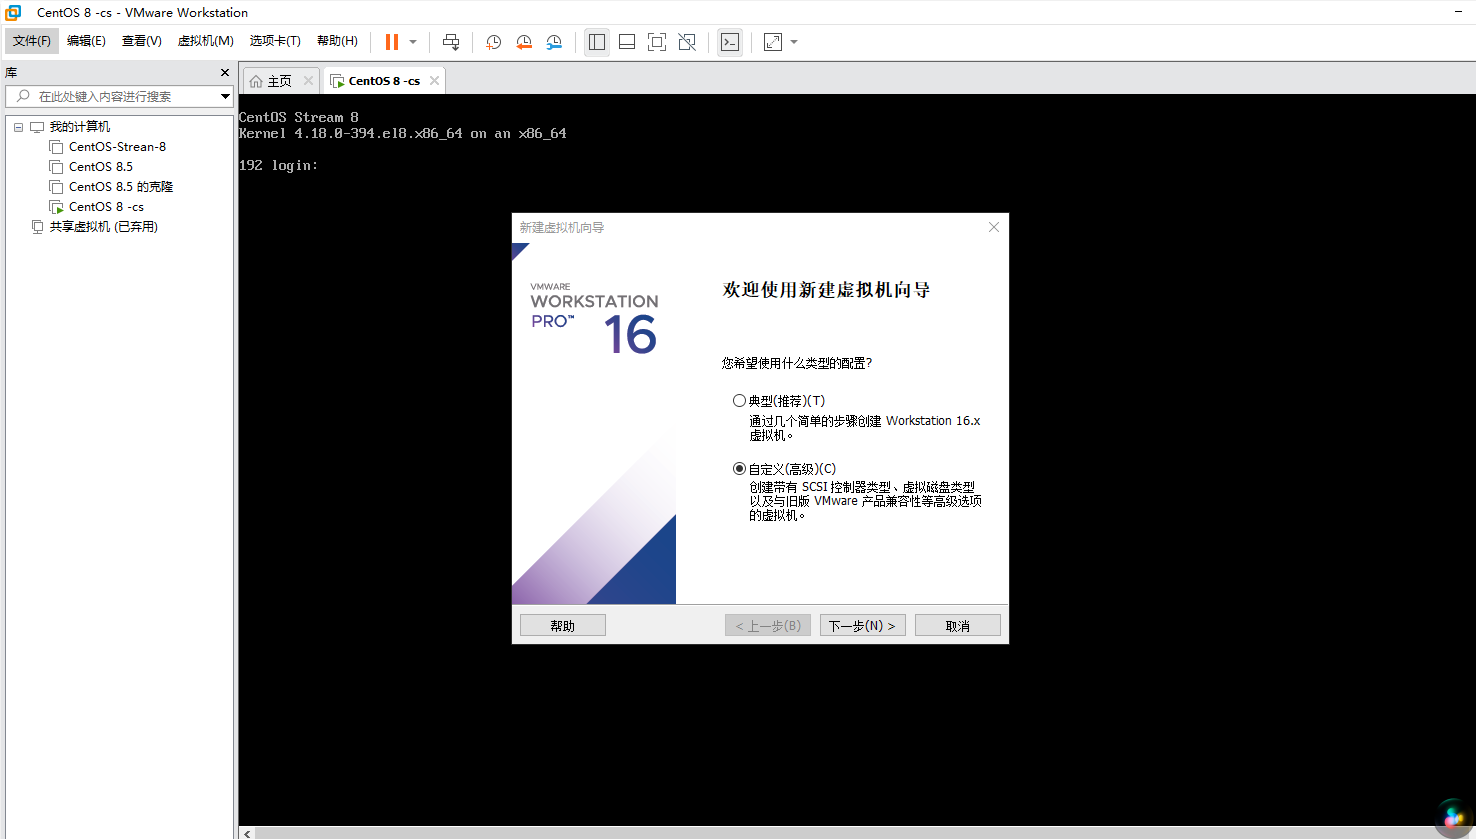
手动安装,创建一个虚拟机不需要添加镜像,然后打开虚拟机
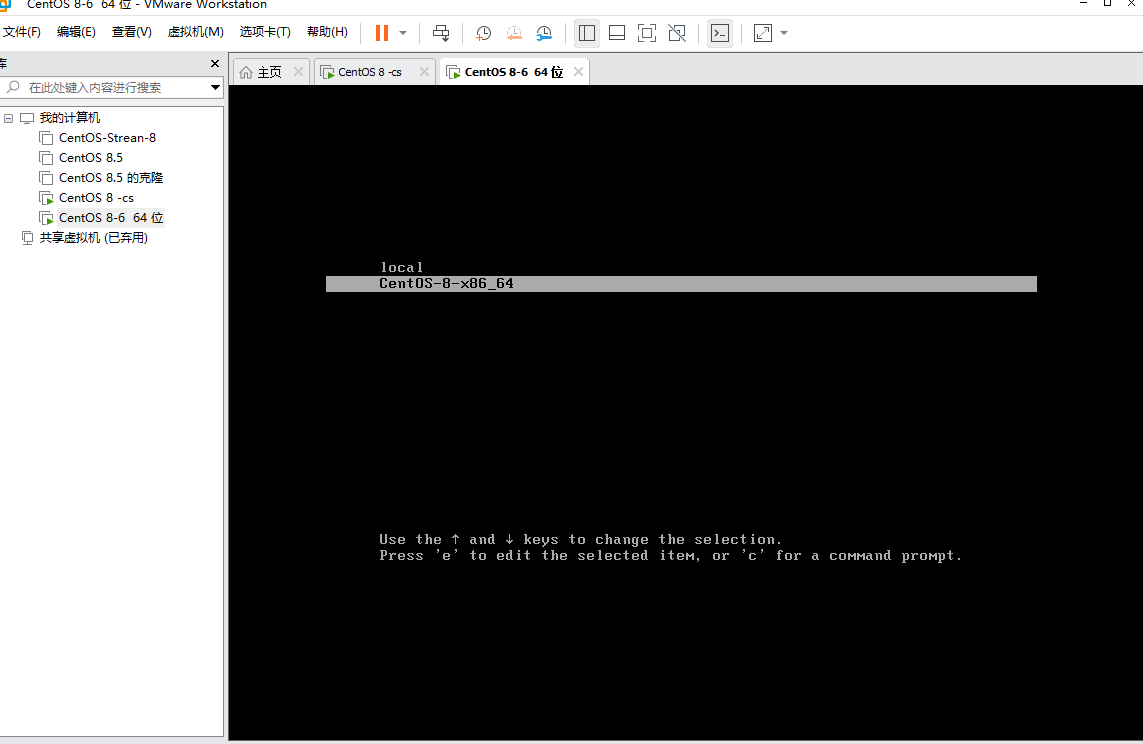
选择上面刚导入生成的镜像
自动安装
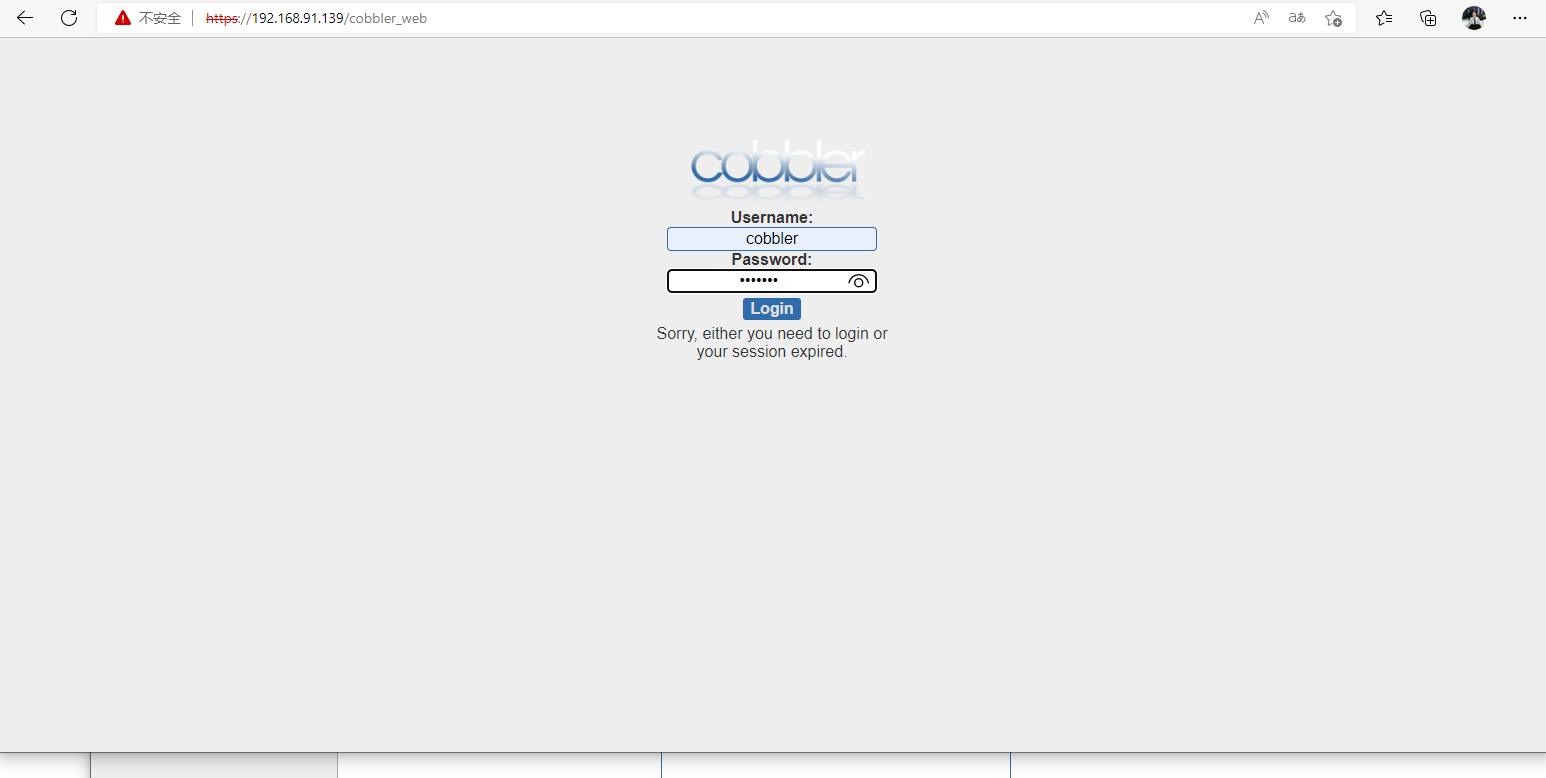
//使用浏览器访问https://192.168.91.139/cobbler_web
//默认登录的用户名和密码都为cobbler
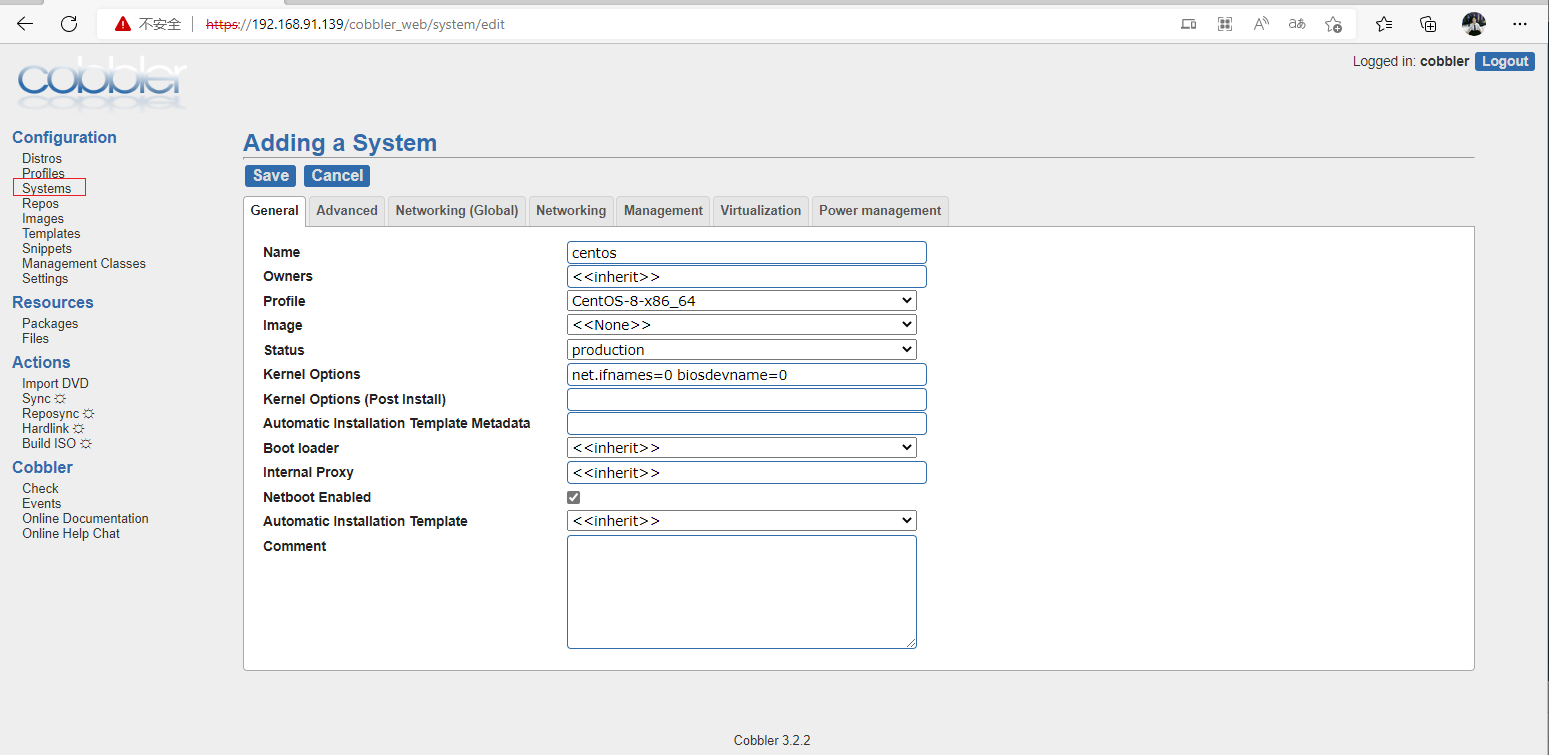
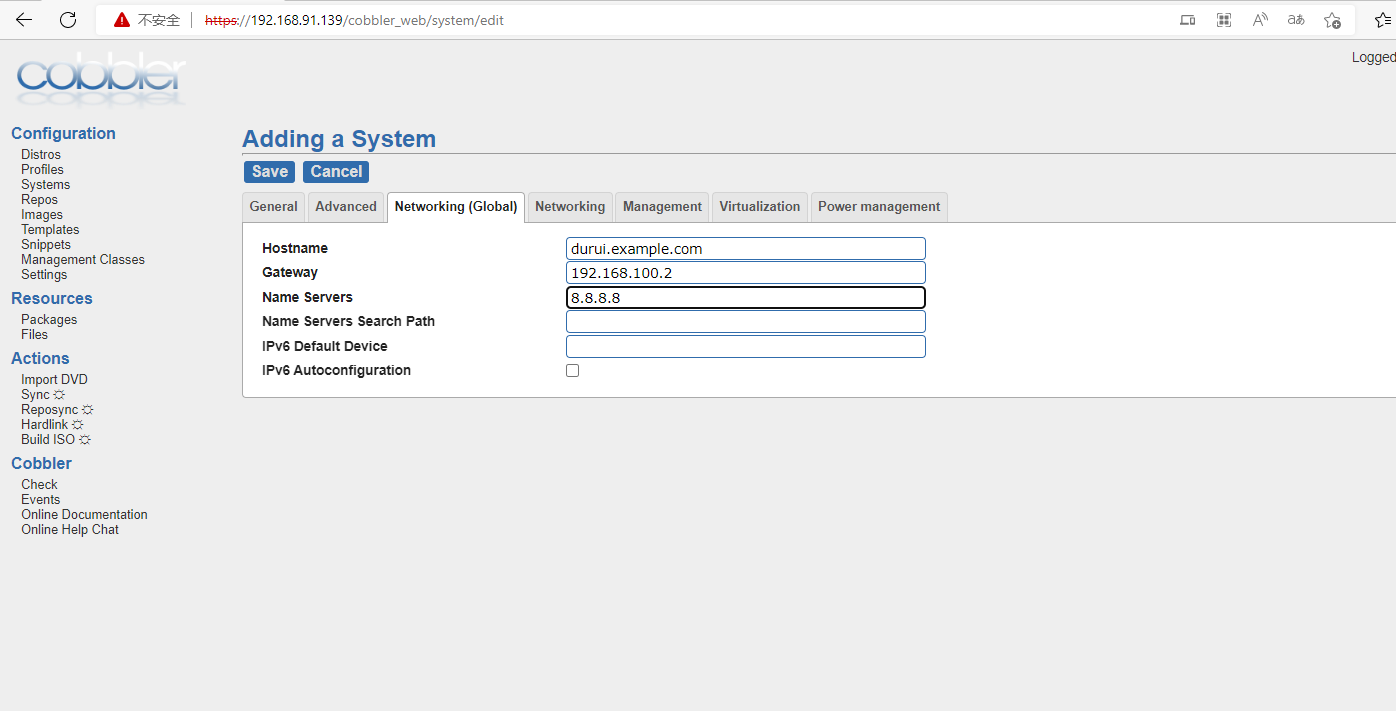
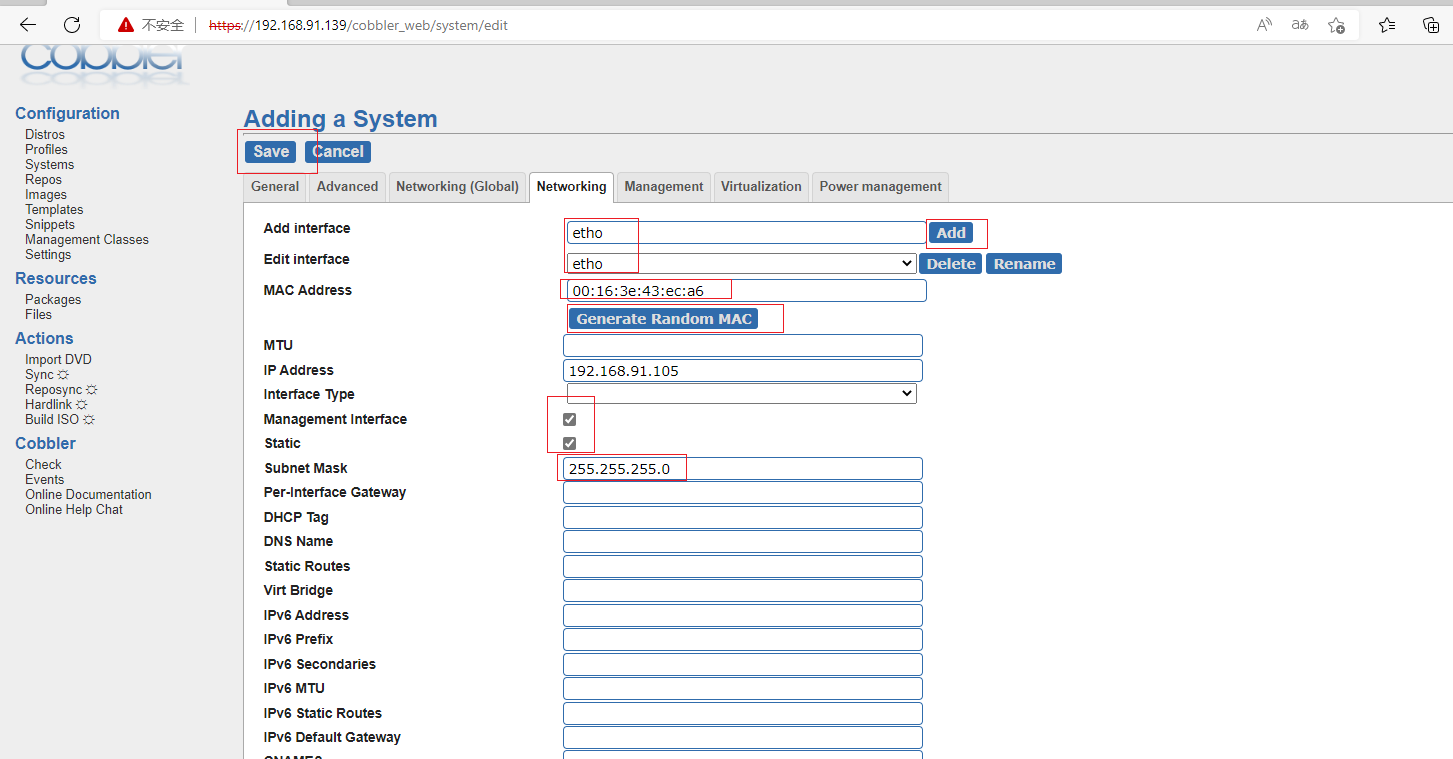
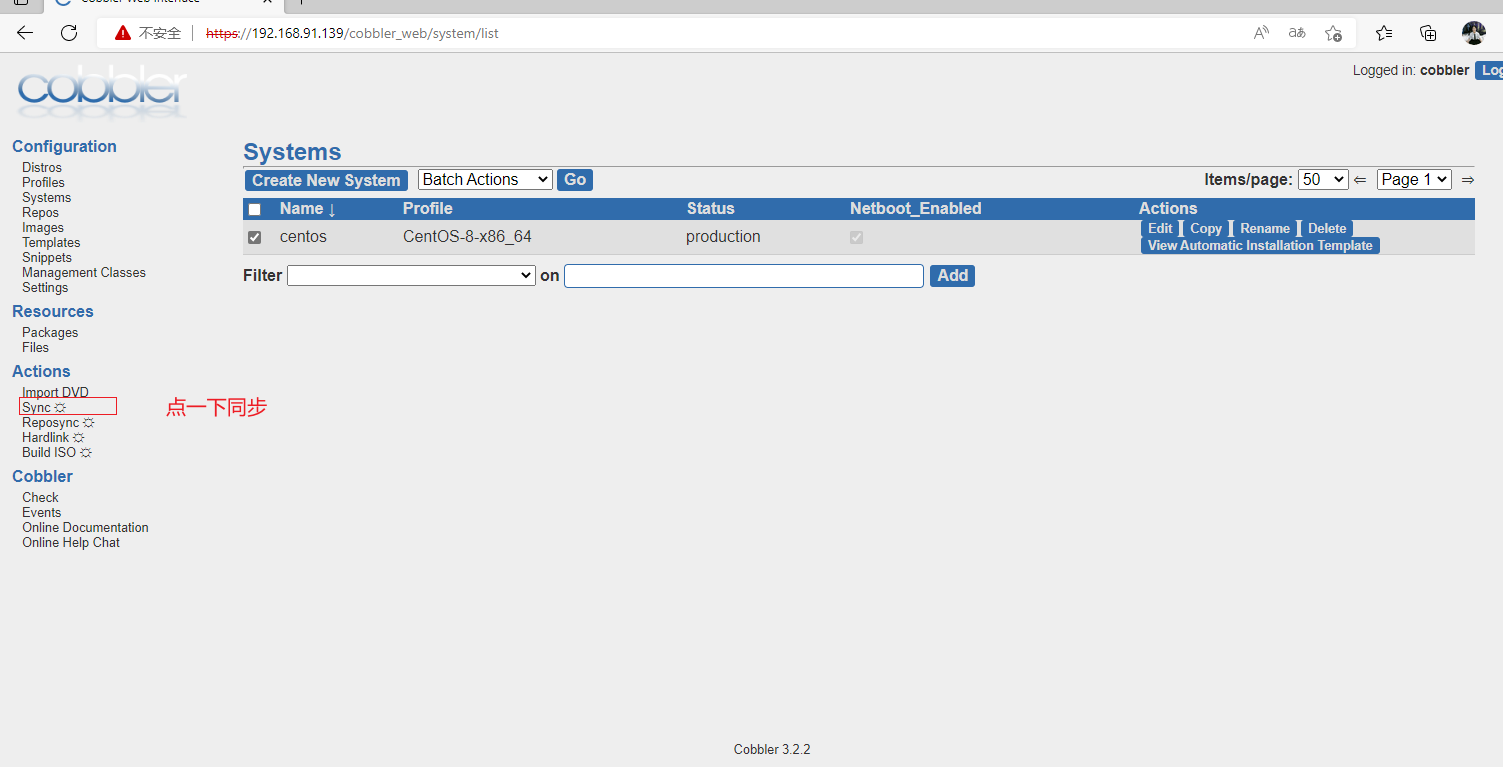
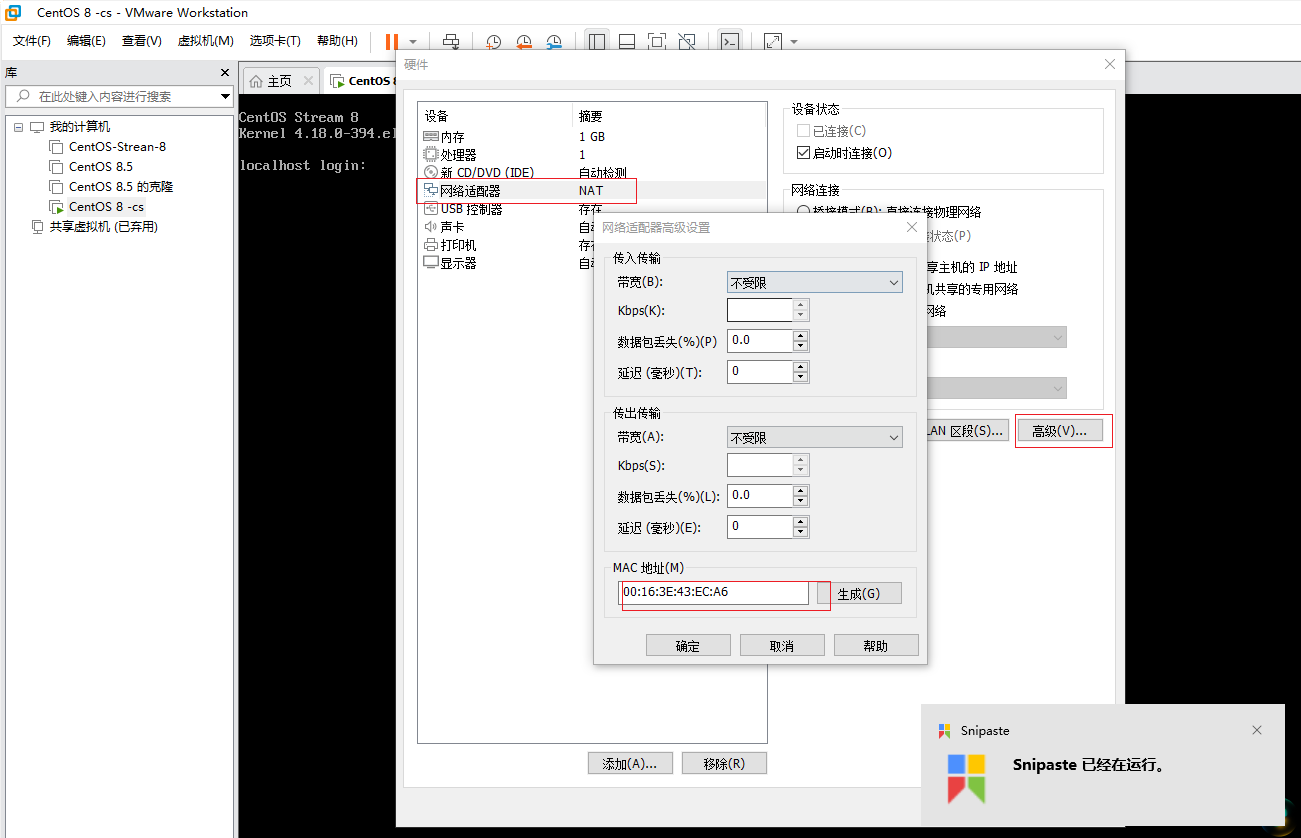
绑定上面生成的MAC地址,创建虚拟机,开机之后就会自动选择不需要自己配置